Checkpoints
Download the monolith code and build your container
/ 10
Create a kubernetes cluster and deploy the application
/ 20
Create a containerized version of orders and product Microservices
/ 20
Deploy the new microservices
/ 20
Create a containerized version of the Frontend microservice
/ 10
Deploy the Frontend microservice
/ 20
Build a Website on Google Cloud: Challenge Lab
- GSP319
- Introduction
- Setup
- Challenge scenario
- Task 1. Download the monolith code and build your container
- Task 2. Create a kubernetes cluster and deploy the application
- Task 3. Create new microservices
- Task 4. Deploy the new microservices
- Task 5. Configure and deploy the Frontend microservice
- Task 6. Create a containerized version of the Frontend microservice
- Task 7. Deploy the Frontend microservice
- Congratulations!
GSP319

Introduction
In a challenge lab you’re given a scenario and a set of tasks. Instead of following step-by-step instructions, you will use the skills learned from the labs in the course to figure out how to complete the tasks on your own! An automated scoring system (shown on this page) will provide feedback on whether you have completed your tasks correctly.
When you take a challenge lab, you will not be taught new Google Cloud concepts. You are expected to extend your learned skills, like changing default values and reading and researching error messages to fix your own mistakes.
To score 100% you must successfully complete all tasks within the time period!
This lab is recommended for students who have enrolled in the Build a Website on Google Cloud quest. Are you ready for the challenge?
Setup
Before you click the Start Lab button
Read these instructions. Labs are timed and you cannot pause them. The timer, which starts when you click Start Lab, shows how long Google Cloud resources will be made available to you.
This hands-on lab lets you do the lab activities yourself in a real cloud environment, not in a simulation or demo environment. It does so by giving you new, temporary credentials that you use to sign in and access Google Cloud for the duration of the lab.
To complete this lab, you need:
- Access to a standard internet browser (Chrome browser recommended).
- Time to complete the lab---remember, once you start, you cannot pause a lab.
Challenge scenario
You have just started a new role at FancyStore, Inc.
Your task is to take the company's existing monolithic e-commerce website and break it into a series of logically separated microservices. The existing monolith code is sitting in a GitHub repo, and you will be expected to containerize this app and then refactor it.
You are expected to have the skills and knowledge for these tasks, so don't expect step-by-step guides.
You have been asked to take the lead on this, after the last team suffered from monolith-related burnout and left for greener pastures (literally, they are running a lavender farm now). You will be tasked with pulling down the source code, building a container from it (one of the farmers left you a Dockerfile), and then pushing it out to GKE.
You should first build, deploy, and test the Monolith, just to make sure that the source code is sound. After that, you should break out the constituent services into their own microservice deployments.
Some FancyStore, Inc. standards you should follow:
-
Create your cluster in
-
Naming is normally team-resource, e.g. an instance could be named fancystore-orderservice1.
-
Allocate cost effective resource sizes. Projects are monitored and excessive resource use will result in the containing project's termination.
-
Use the
e2-mediummachine type unless directed otherwise.
Your challenge
As soon as you sit down at your desk and open your new laptop, you receive the following request to complete these tasks. Good luck!
Task 1. Download the monolith code and build your container
-
Log in to your new project and open up Cloud Shell.
-
First things first, you'll need to clone your team's git repo. There's a setup.sh script in the root directory of the project that you'll need to run to get your monolith container built up.
-
After running the
setup.shscript, ensure your Cloud Shell is running its latest version of nodeJS:
There will be a few different projects that can be built and pushed.
-
Push the monolith build (conveniently located in the
monolithdirectory) up to the Google Container Registry. There's a Dockerfile located in the~/monotlith-to-microservices/monolithfolder which you can use to build the application container. -
You will have to run Cloud Build (in that monolith folder) to build it, then push it up to GCR.
-
Name your artifact as follows:
- GCR Repo: gcr.io/${GOOGLE_CLOUD_PROJECT}
- Image name:
- Image version: 1.0.0
Hint:
Make sure that you submit a build named
Click Check my progress to verify the objective.
Task 2. Create a kubernetes cluster and deploy the application
Now that you have the image created and sitting in the container registry, it's time to create a cluster to deploy it to.
You've been told to deploy all of your resources in the
- Create your cluster as follows:
-
Cluster name:
-
Region:
-
Node count: 3
Hint:
Make sure your cluster is named
Now that you've built up an image, and have a cluster up and running, it's time to deploy your application.
You'll need to deploy the image that you've built onto your cluster. This will get your application up and running, but it can't be accessed until you expose it to the outside world. Your team has told you that the application runs on port 8080, but you will need to expose this on a more consumer-friendly port 80.
- Create and expose your deployment as follows:
- Cluster name:
- Container name:
- Container version: 1.0.0
- Application port: 8080
- Externally accessible port: 80
- Make note of the IP address that is assigned in the expose deployment operation. You should now be able to visit this IP address from your browser!
You should see the following:
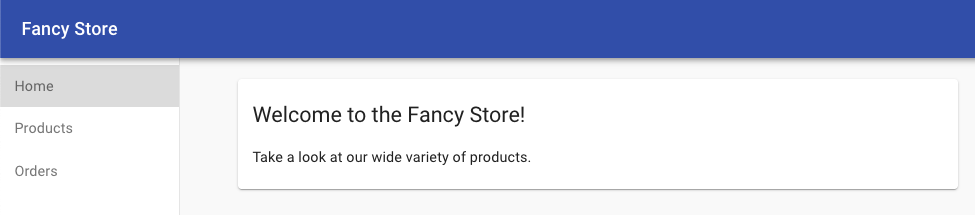
Hint:
Make sure your deployment is named
Click Check my progress to verify the objective.
Now that you can build and deploy your Fancy Store monolith application, you're ready to start breaking it down into microservices!
Migrate monolith to microservices
Now that you have your existing monolith website running on GKE, you can start breaking each service into a microservice. Typically, a planning effort should take place on which services to break into smaller chunks, typically around specific parts of the application like business domain.
For the purposes of this Challenge, fast forward a bit and pretend that you have successfully broken out the monolith into a series of microservices: Orders, Products, and Frontend. Your code is ready, so now you've got to deploy your services.
Task 3. Create new microservices
There are 3 services that need to be broken out into their own containers. Since you are moving all of the services into containers, you need to track the following information for each service:
- The root folder of the service (where you will build the container)
- The repository you will upload the container to
- The name & version of the container artifact
Create a containerized version of your microservices
Below is the set of services which need to be containerized.
- Navigate to the source roots mentioned below, and upload the artifacts that are created to the Google Container Registry with the metadata indicated:
|
Orders Microservice |
|
|
Products Microservice |
|
- Once these microservices have been containerized, and their images uploaded to the GCR, you should deploy and expose these services.
Hint: Make sure that you submit a build named
Click Check my progress to verify the objective.
Task 4. Deploy the new microservices
Deploy these new containers following the same process that you followed for the
- Create and expose your deployments as follows:
|
Orders Microservice |
|
|
Products Microservice |
|
NOTE: Please make note of the IP address of both the Orders and Products services once they have been exposed, you will need them in future steps.
- You can verify that the deployments were successful and that the services have been exposed by going to the following URLs in your browser:
http://ORDERS_EXTERNAL_IP/api/orders
http://PRODUCTS_EXTERNAL_IP/api/products
You will see each service return a JSON string if the deployments were successful.
Hint: Make sure your deployments are named
Click Check my progress to verify the objective.
Task 5. Configure and deploy the Frontend microservice
Now that you have extracted both the Orders and Products microservice, you need to configure the Frontend service to point to them, and get it deployed.
Reconfigure Frontend
- Use the
nanoeditor to replace the local URL with the IP address of the new Products microservices:
When the editor opens, your file should look like this:
- Replace the
REACT_APP_PRODUCTS_URLto the new format while replacing with your Orders and Product microservice IP addresses so it matches below:
-
Press CTRL+O, press ENTER, then CTRL+X to save the file in the
nanoeditor. -
Now rebuild the frontend app before containerizing it:
Task 6. Create a containerized version of the Frontend microservice
With the Orders and Products microservices now containerized and deployed, and the Frontend service configured to point to them, the final step is to containerize and deploy the Frontend.
Use Cloud Build to package up the contents of the Frontend service and push it up to the Google Container Registry.
- Service root folder: ~/monolith-to-microservices/microservices/src/frontend
- GCR Repo: gcr.io/${GOOGLE_CLOUD_PROJECT}
- Image name:
- Image version: 1.0.0
This process may take a few minutes, so be patient.
Hint: Make sure that you submit a build named
Click Check my progress to verify the objective.
Task 7. Deploy the Frontend microservice
Deploy this container following the same process that you followed for the "Orders" and "Products" microservices.
- Create and expose your deployment as follows:
- Cluster name:
- Container name:
- Container version: 1.0.0
- Application port: 8080
- Externally accessible port: 80
- You can verify that the deployment was successful and that the microservices have been properly exposed by hitting the following the IP address of the frontend service in your browser:?.
You will see the Fancy Store homepage, with links to the Products and Orders pages powered by your new microservices.
Click Check my progress to verify the objective.
Congratulations!
Earn your next skill badge
This self-paced lab is part of the Build a Website on Google Cloud skill badge quest. Completing this skill badge quest earns you the badge above, to recognize your achievement. Share your badge on your resume and social platforms, and announce your accomplishment using #GoogleCloudBadge.
This skill badge is part of Google Cloud’s Infrastructure Modernization portfolio. Continue your learning journey by searching the catalog for 20+ other skill badge quests in which you can enroll.
Google Cloud training and certification
...helps you make the most of Google Cloud technologies. Our classes include technical skills and best practices to help you get up to speed quickly and continue your learning journey. We offer fundamental to advanced level training, with on-demand, live, and virtual options to suit your busy schedule. Certifications help you validate and prove your skill and expertise in Google Cloud technologies.
Manual Last Updated December 05, 2023
Lab Last Tested December 05, 2023
Copyright 2024 Google LLC All rights reserved. Google and the Google logo are trademarks of Google LLC. All other company and product names may be trademarks of the respective companies with which they are associated.